This procedure has been tested with a 2015 Apple TV. Some differences may exist with other versions of the device
This procedure will erase all data from your device
1- Update your Apple TV device with the latest version of tvOS
2- Install Apple Configurator
3- Using USB-C connect your Apple TV to your computer
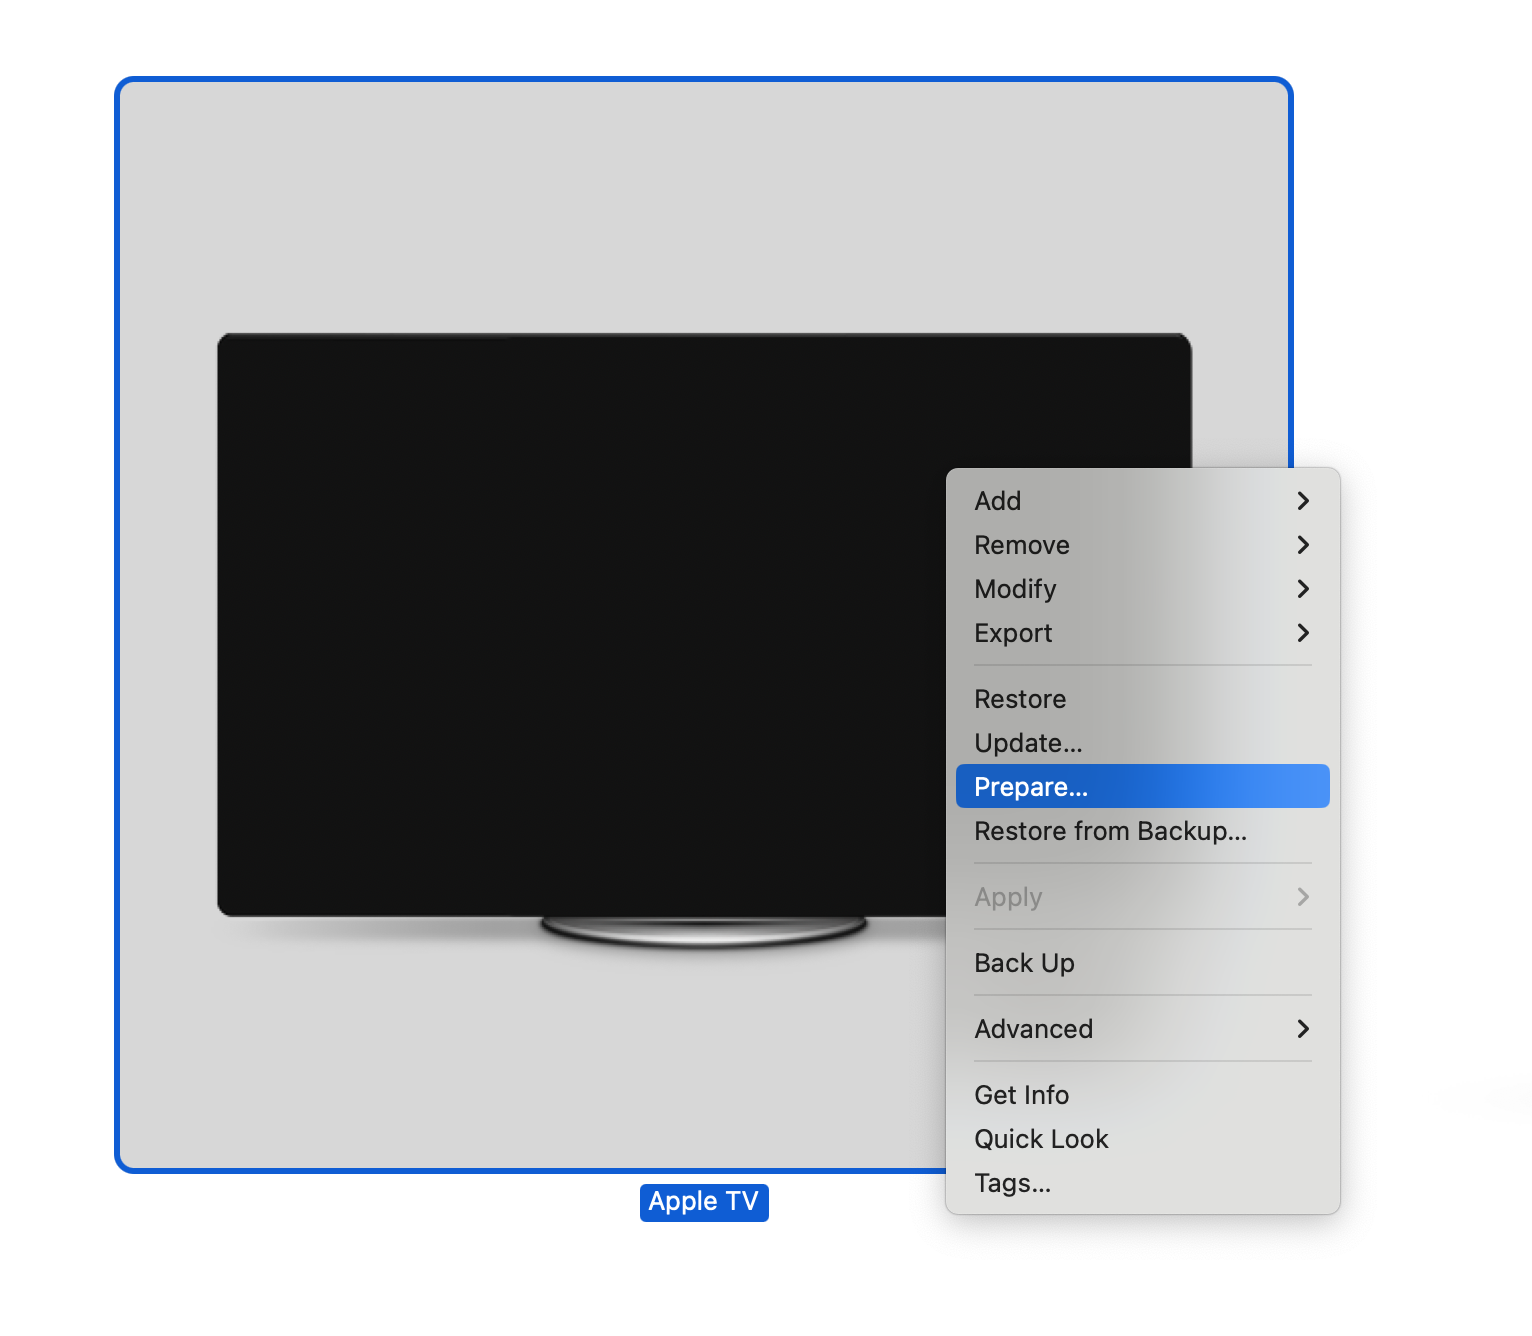
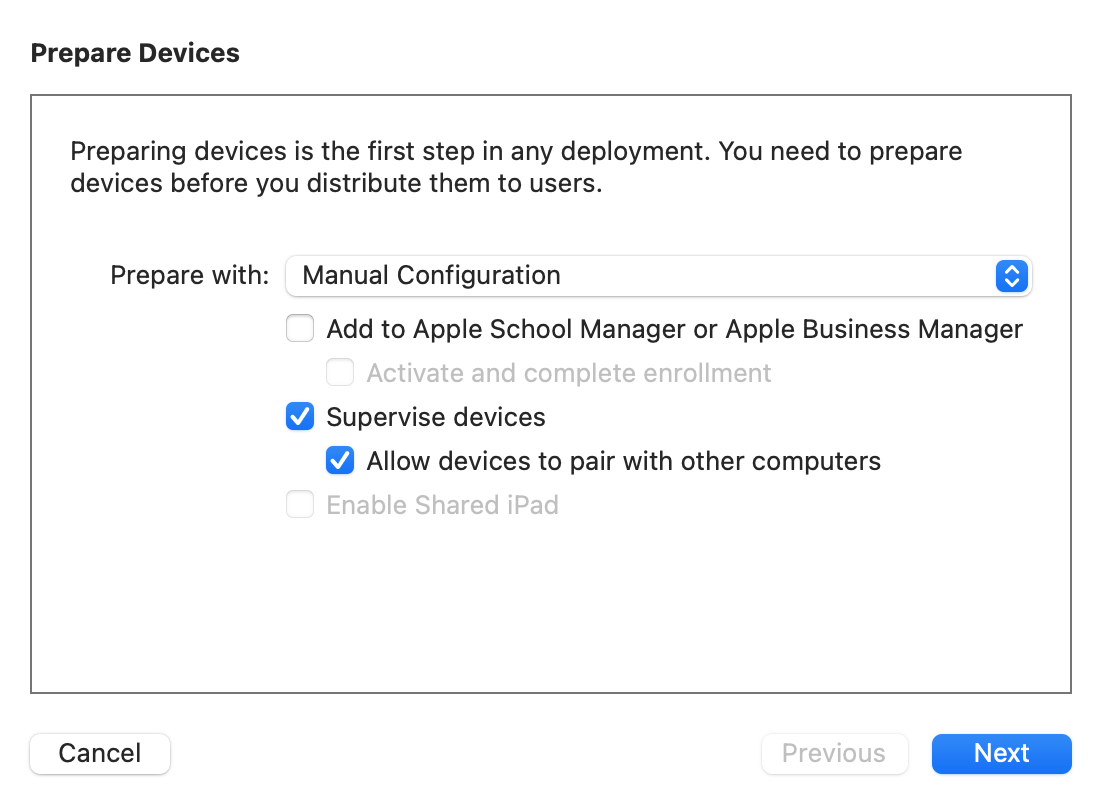
4- Turn your Apple TV into a supervised device
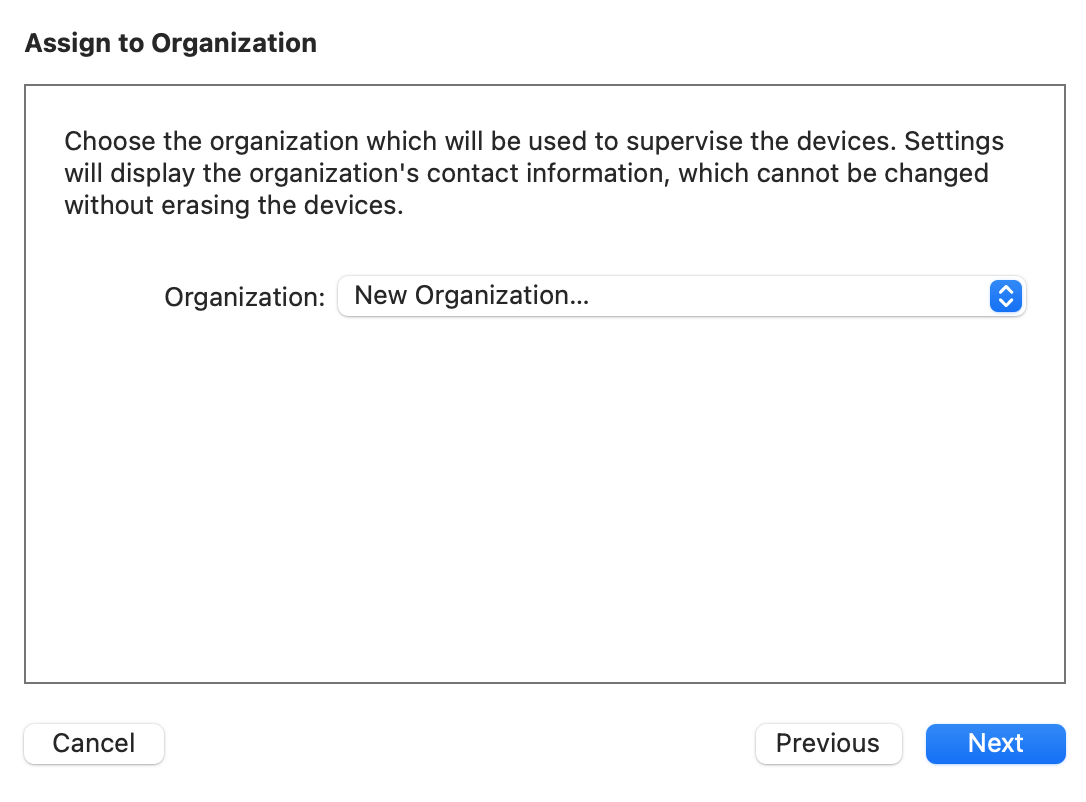
- Right click on the device and click “Prepare”, then go through the Configurator as shown in the screenshots
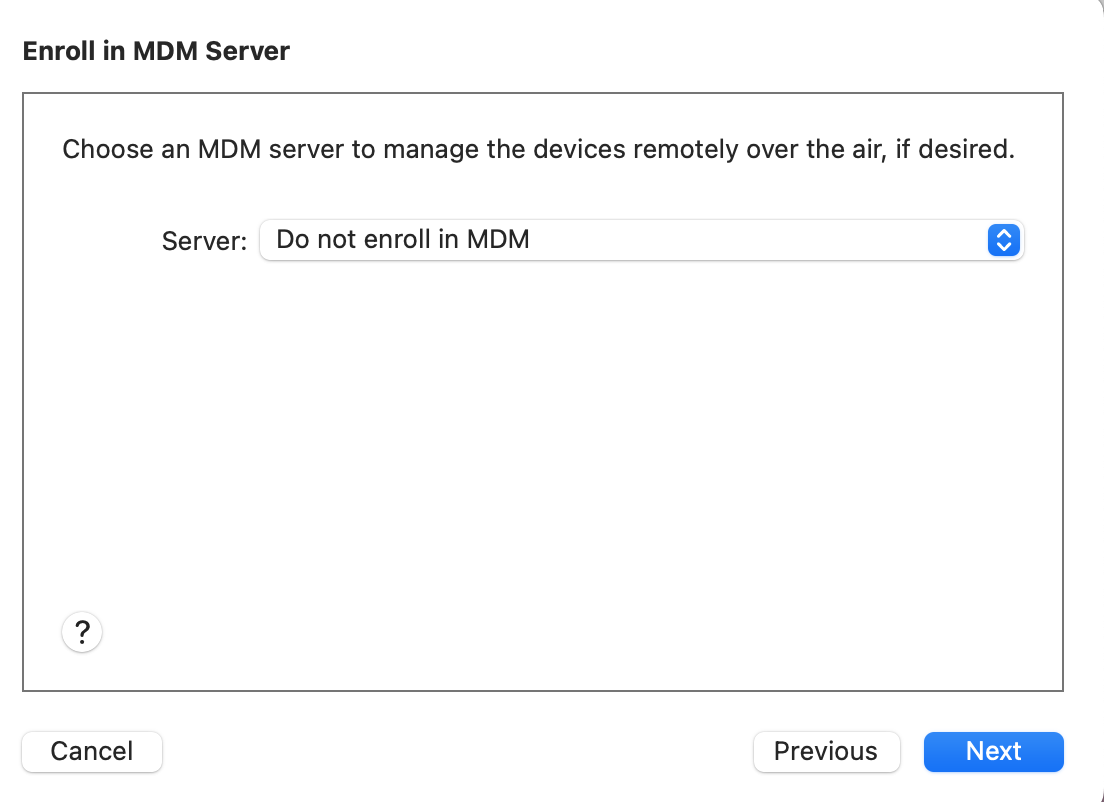
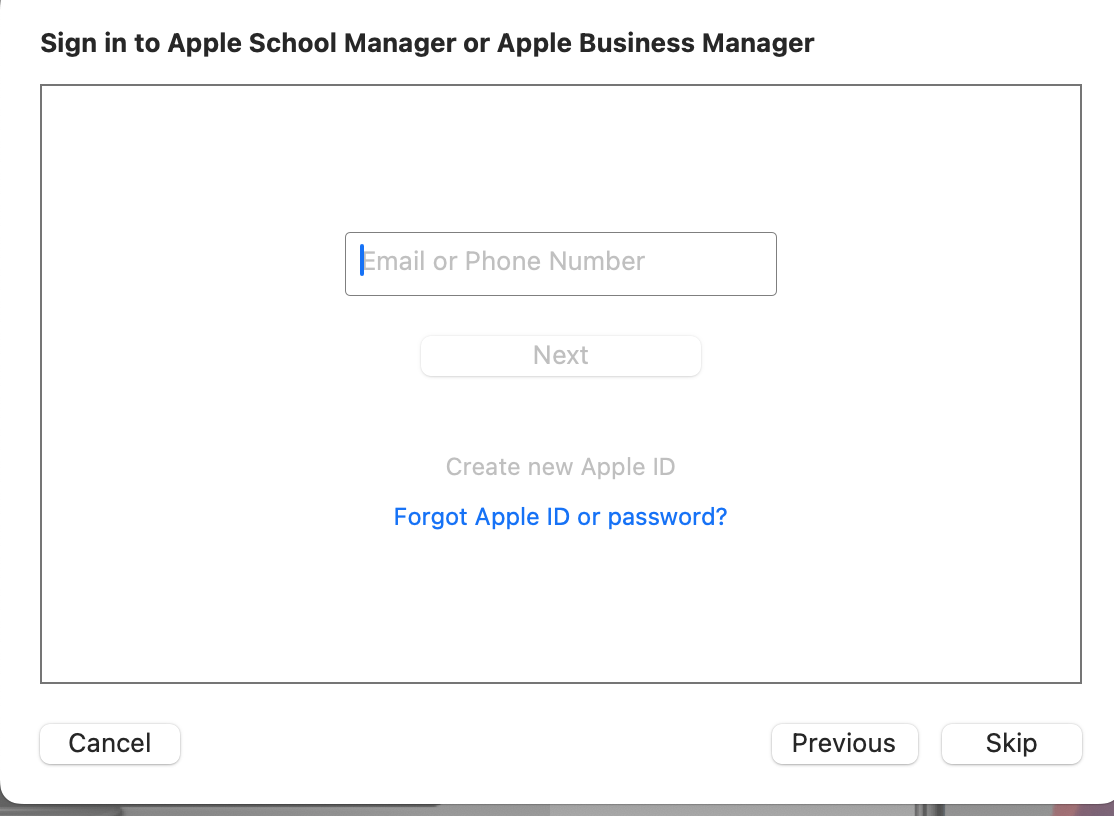
(press Skip)
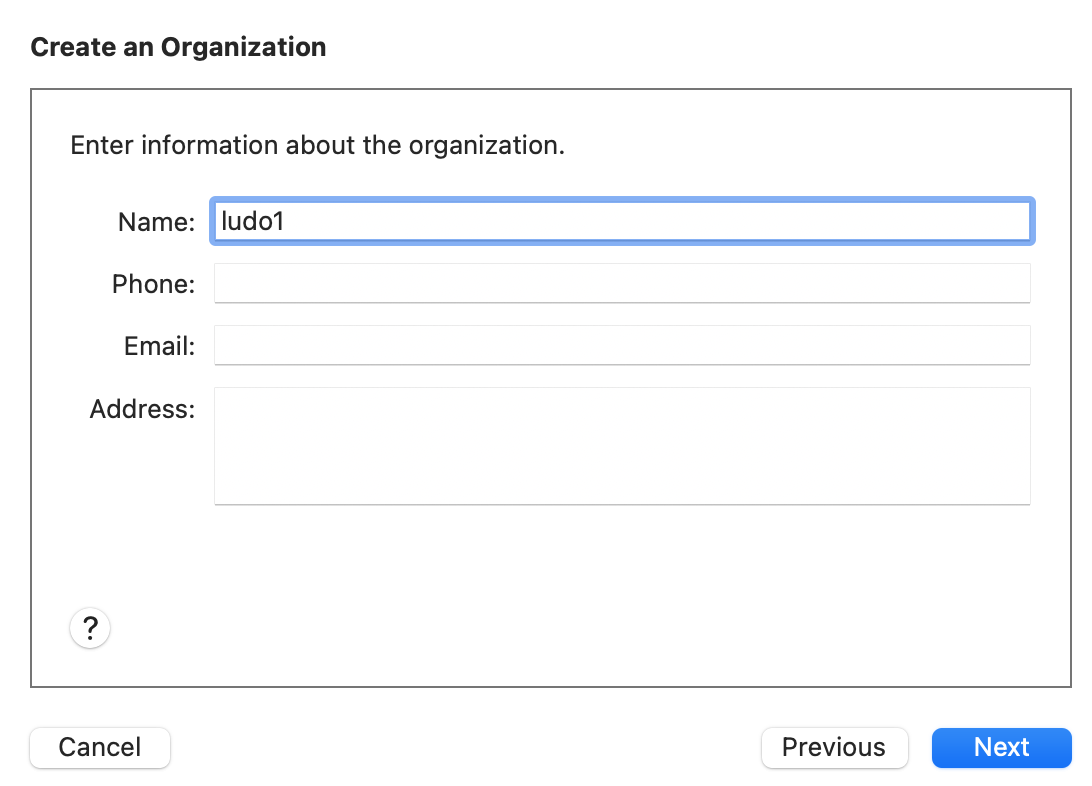
(A random name is fine)
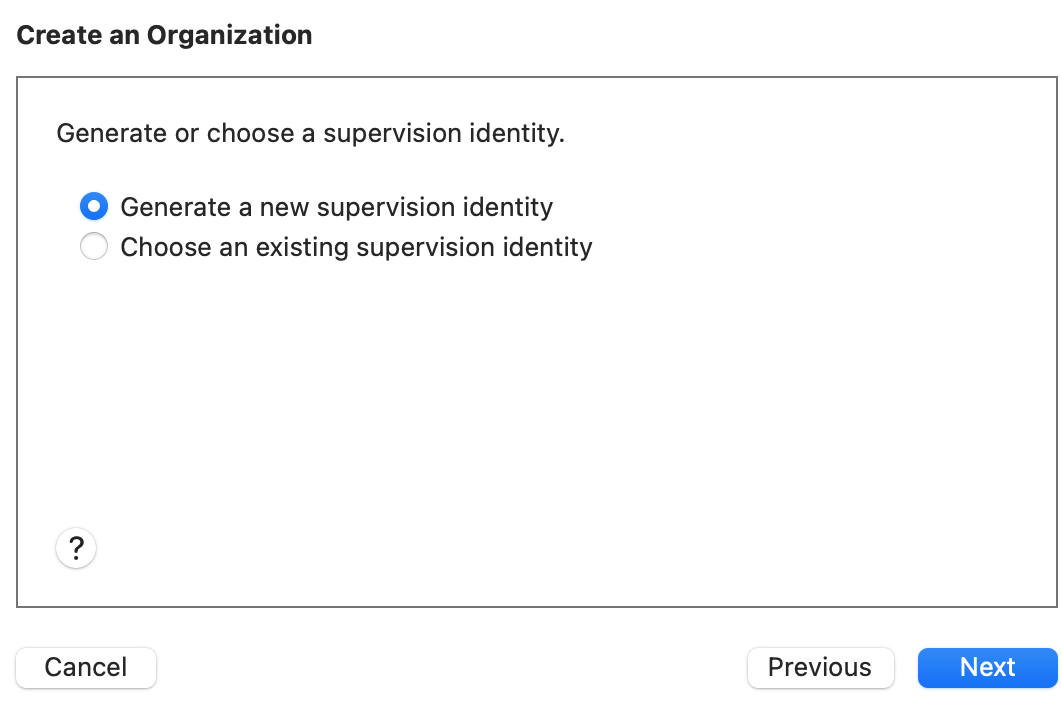
(It might take a few minutes to set up, you can start preparing your certificate and profile in the meantime (5-7))
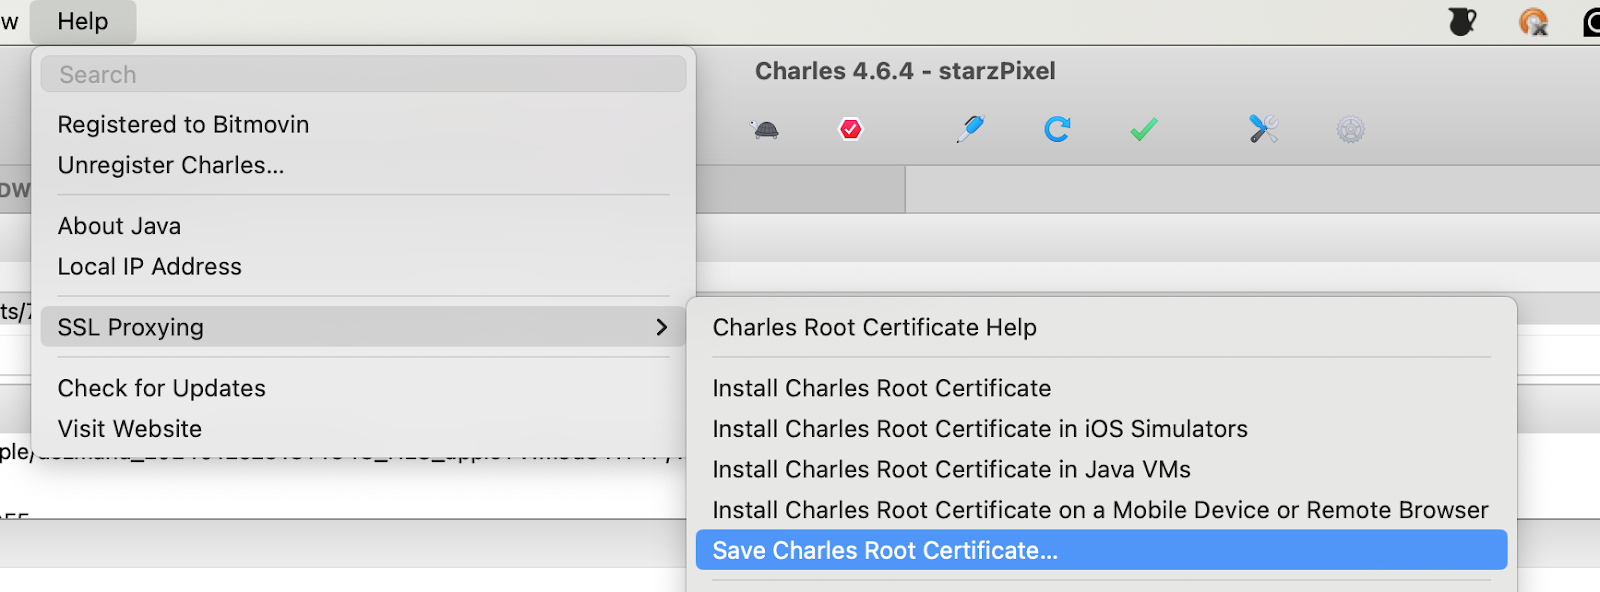
5- Get the Charles Root certificate and save it.
6 Convert the charles certificate into .der
Open a terminal and enter the following :
openssl x509 -inform PEM -outform DER -in charles-ssl-proxying-certificate.pem -out Applecertificate.der
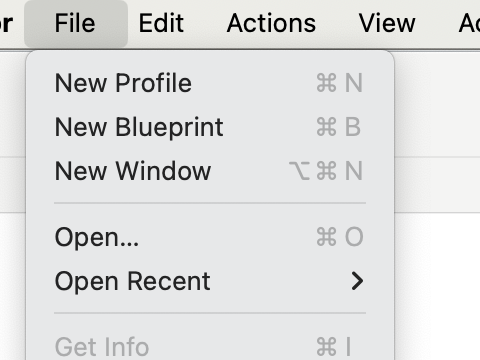
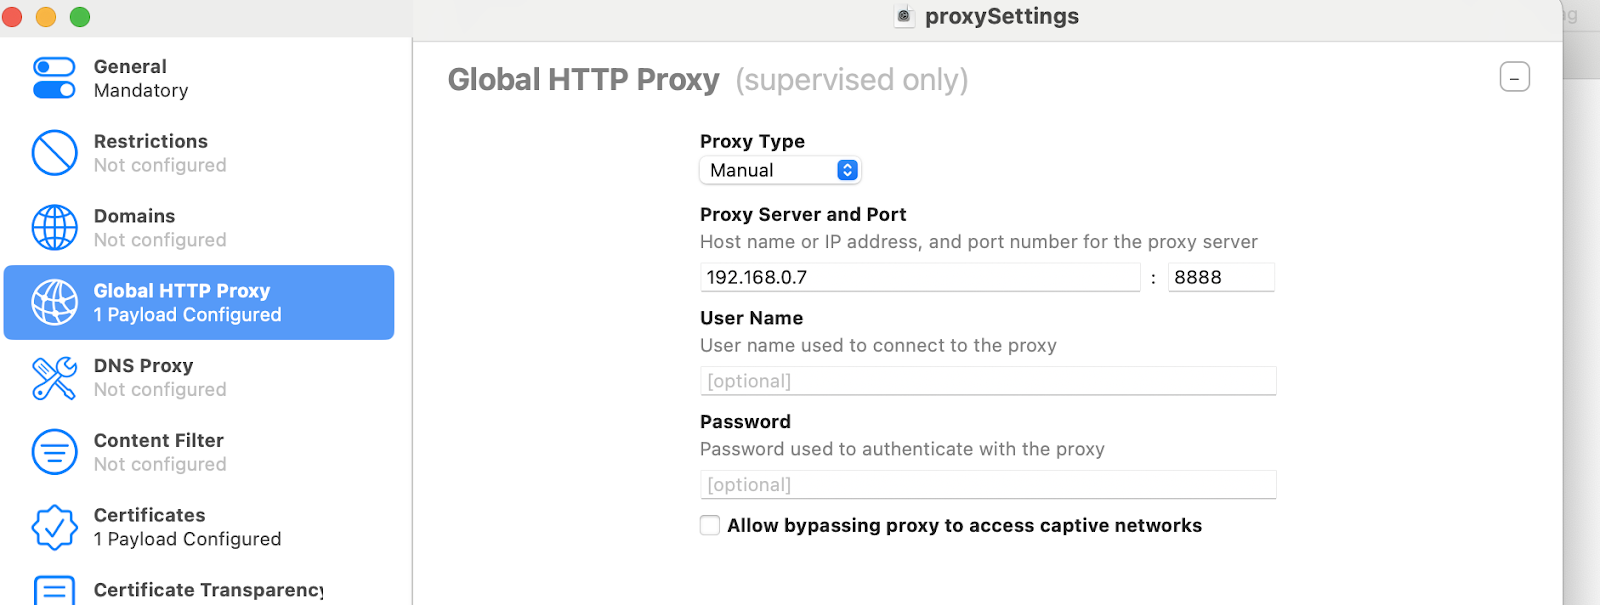
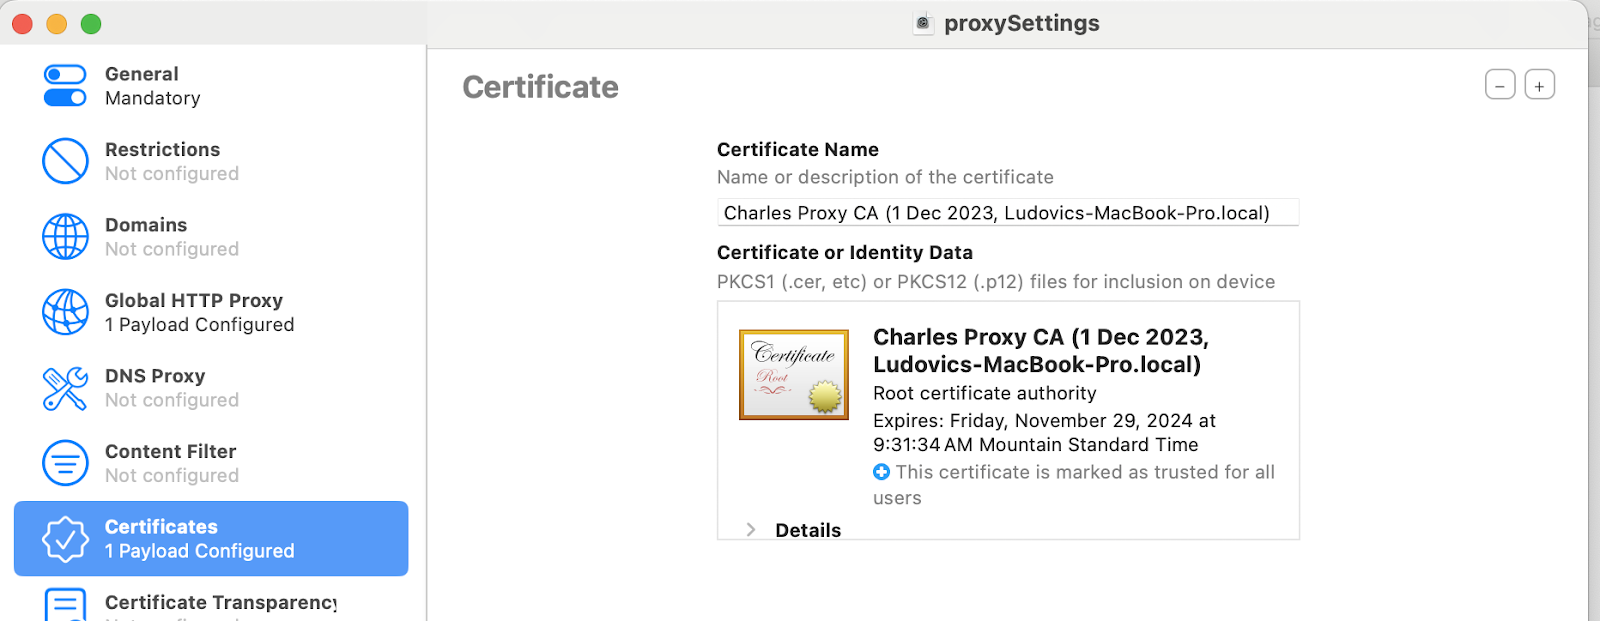
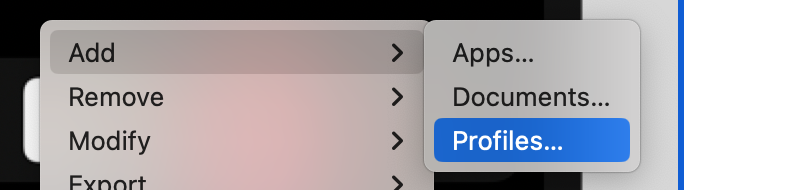
7- In Apple Configurator, create a new profile with your proxy settings and certificate
(click New Profile)
- The proxy settings are the IP of the computer that is running Charles, as well as the port (typically 8888)
- Add the certificate you just created
8- Setup the device with your Iphone or manually (wifi, Apple ID etc).
If you need to use the App store, don’t forget to log in with your apple ID. This might be your only chance to do so, otherwise the app store might not appear and you might have to start everything over (I’m not certain about this exact limitation)
9- Add the profile to your device
9^3/4- If you need to install apps from the app store, do it before step 9
(I had issues using the app store with Charles enabled)
10- Play a stream and inspect the requests, redirect, rewrite etc on Charles proxy, as you need
